SVG's are the easiest way to embed icons into any website. And because they are valid HTML, it might seem like a perfectly fine thing to just add all your SVGs into the JSX of your React app. However, SVG's are some of the most expensive things to add to your Javascript bundle.
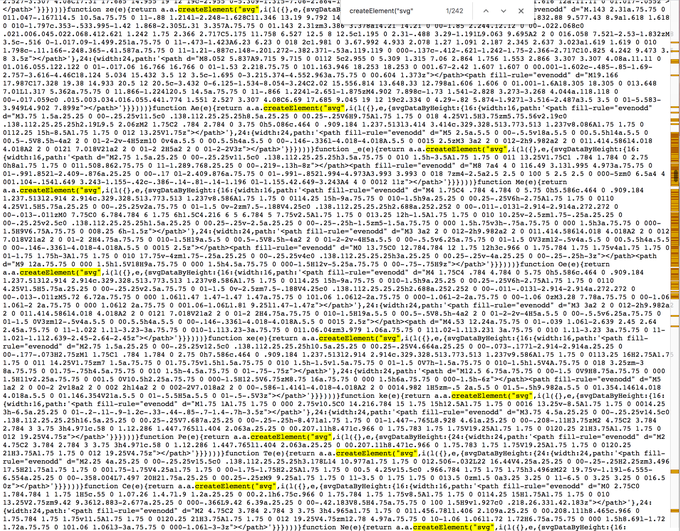
SVGs are optimised to be embedded into HTML, however, when we add it to the Javascript bundle, it adds unnecessary bloat to our JS and blocks rendering until it is parsed and executed. Not sure you believe me? Check out this output JS bundle that includes SVGs inside JSX.
And no, this is not an issue because of a lack of tree shaking, this is an issue because the SVG is inside React.createElement. We just want to render SVGs, we don't want React to manage this.
The easy solution is to use SVGs as image assets directly, rather than as JS embedded image assets. Basically, leave it in an .svg file, rather than inside of a .jsx file.
Jacob Paris has an amazing article about how this can be solved using a sprite sheet of SVG assets.
99% of his article applies here, so I would recommend you read that first. At the end, he shows how this can be used in Remix.
I want to walk through how I got this same strategy to work on Next.js and some of the different pitfalls I ran into along the way.
TLDR; Just show me the code
https://github.com/Jacob-Roberts/nextjs-image-sprite
Edit: You should refer to the code in this repo instead of in this blog post as it is the most up to date. I've also removed things like execa, fs-extra, and tsx to simplify your dependencies.
Getting Started
The first thing I did was copy from the Kent C. Dodds' Epic Stack repo which has the solution proposed by Jacob Paris implemented in Remix.
It's almost exactly what we need.
First, I created an other folder in my root directory, and copied the sly folder, svg-icons/README.md, and build-icons.ts into it.
NPM Dependencies
To run this script, lets first install all the dependencies:
And note that these are all dev dependencies, they are never shipped to your users.
While we're here, let's also setup the scripts that we will use to build the icons.
Add the following to your scripts
Output and Icons
The first thing we're going to change is the output folder.
The script we copied has the output folder set to app/components/ui/icons on line 10.
Here is where Next.js differs from Remix. Next.js has a custom Webpack SVG loader that has some differences.
More details below, but for now you'll need to modify the script to output the sprite.svg file to the public folder, and the rest can go wherever you want.
I've set it up so I have a publicDir and an outputDir.
Now you'll need to go edit the generateIconFiles function to use these new folders
Perfect, now you are ready to build the icons!
Let's go ahead and add an icon for you to use
Go ahead and choose one, I always need to use the chevron and hamburger icons, so I'll go ahead and download the chevron-down and hamburger-menu icons from radix ui.
Now you're ready to go!
React
To use the SVG in React, let's first copy the Icon component from the Epic Stack:
Here is where Next.js differs from Remix.
Because Next.js registers a custom webpack .svg loader, we can't actually import this SVG sprite using webpack.
So sadly, we can't use import href from './icons/sprite.svg'.
It's probably possible with a smart webpack config change, but it was impossible with my testing.
So rather than using an auto-hashed URL, we rely on the public base URL. While not ideal, this will work perfectly and you could start using it just like that!
Next.js Pre-load
In order to preload the asset in Next.js, you simply add a <head> tag to your root layout and preload the sprite.
Caching
One of the main reasons we did this was to get performance benefits of only caching & downloading a single file that isn't parsed by the JS engine.
Luckily, we can easily reproduce the webpack caching behavior in Next.js
First, open up the build-icons.ts file and import the crypto module, so we can use the create hash function
Now, head down to the very bottom of the generateSvgSprite function and replace return writeIfChanged(outputPath, output); with the following
Now if you run npm run build:icons again, you will see a new sprite.{hash}.svg file in your public folder.
The only thing you'll have to keep in sync is the const href="/sprite.{hash}.svg"; URL in your React component. (But I'm sure you can modify the script to do this for you 😉)
Next.js Config
The last thing to do to make caching work is to actually set the proper cache headers on your sprite file.
To do this open your next.config.js file and add the following headers config:
And with that you are all set! You now can get the full benefits of SVG sprites in a Next.js app!
Special thanks to Jacob Paris and Kent C. Dodds for their initial work on this concept.
